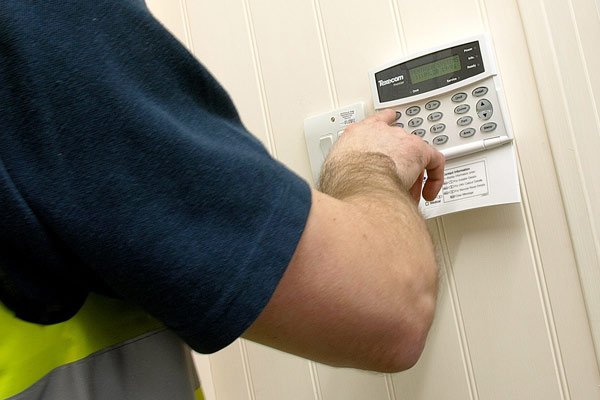
Texecom Alarm: How to install texecom Wired & Wireless Alarm kit?

Texecom Alarm: Does your house currently have an alarm system? If you are using an entire security system, it is time to upgrade it and install a new texecom alarm kit with extraordinary features and options. It will have door contacts along with garage door security.
Also, the bell box, keypad, and mounted flush are available via your new alarm kit. Let’s change over your old and traditional burglar alarm system while we try our best to explain the texecom alarm kit installation process. Stay with us for more information.
Texecom Ricochet Premier Elite 64W
Do you want to Buy this product? Click on image
(Discounted For trade users)
Installing process of texecom alarm kit
Since burglars are becoming more advanced and innovative, it is time to protect your interior and exterior doors with the help of texecom alarm kit. But how to install texecom alarm system?
If you set and install an alarm system, we don’t think many people will ever understand and observe it.
The alarm system will inform you if someone tries to enter your property or come around your house. You will need the cable to install the texecom alarm system.
Firstly you need to bring the cables down the wall and drill them into the top of the door frame.
There will be sensors in the wall and door frame. Sometimes these sensors look awful and big bulky. Put the new kit on instead of the PIR in the corner of the rooms because you can get a lot of nuisances with PIR going off falsely.
Remove the existing alarm system
To install the new texecom kit, check out the easy programming guides. So you will understand how to get on and take along for the ride. The box of your texecom kit includes:
- Main panel
- Metal cover
- Flush text panel ( cut into the wall)
- Battery
- Door contacts
- 2 garage door contacts
- Smart com ( on access remotely via the phone)
- Odyssey backlit bell box
As the first step, you must identify what wires you run to which zone in the house so the bell box will be usable.
Don’t forget to remove your existing and current alarm and continue to test every cable; note what goes where and then that will allow you to decide what zones you want on the new alarm system.
You only temporarily go to connect things up like the bell box. You need a ladder to hand to get the bell box up. Follow the below instruction for installing or setting up your texecom alarm kit:
- To identify the cable, you will use a multimeter and see where the PIR used to be
- Take the PIR down
- Twist them together to make a loop
- Go back into the place
- Use the multimeter on the continuity test
- Make sure it creates a circuit or a loop to prove the cable
- Disconnect every other PIR not to get the false reading
- Connect the cable, and you will get a buzzing noise
- Check it again
What you have done before is removing all the other existing PIR and testing all the cables continuity-wise to figure out what cable went where you identified them.
Then you can decide what PIR you want to include on the new alarm and add the options to your new system.
Do you want to Buy this product? Click on image
(Discounted For trade users)
Designing the layout
After removing your existing alarm kit, it is time to place the new alarm detection device. Every section of your new texecom alarm kit needs a perfect and recognized installation location. Moreover, you have to mount the panel in a dry area.
It also must be near a power source and telephone line. Before connecting the battery, it is better to complete the wiring process. Then you have to install the keypad and connect it to the control panel after mounting.
Zone wiring is the next step. In addition, another wiring is essential, meaning connecting the bells or sirens entirely and correctly. After all these processes, you need to apply power to the alarm system’s control panel.
Wiring the control panel
An important matter is disconnecting the supply power at the consumer unit before connecting your alarm system control panel. The qualified electrician will need your texecom alarm kit while you install it.
The terminal blocks are the main parts of the alarm panel, so you have to connect them to the main supply. Check out the safety standards and try to wire the control panel of your texecom alarm system. You have to consider the national wiring regulation of Manchester to install your texecom alarm panel.
After disconnecting your device, you must use the 2 disconnect poles of your new device. Backup protection is also another important matter. We suggest you use the main cable with enough carrying capacity for the rated current alarm system.
Complete the installation process
The installation process finished after you connected the alarm system correctly. Check out the manual installation guide of your texecom alarm kit, which shows you how to program to record the data.
We recommend you read the manual instruction before installing the alarm kit. After the correct installation process, you need to program the alarm system. This procedure is also available on the instruction manual note.
Finally, it is time to test your installed alarm system. The testing process will help you ensure all features and functions of your installed texecom kit are proper as required.
Additionally, you must use appropriate screws to mount the panel, so don’t forget to use a suitable screw for designing the central keyhole slot.
Don’t worry about the installation process; it will be easy for you to install your texecom kit alarm yourself.
Read more: How to setup and connect the texecom wireless alarm system to wifi?
Additional information about the installation of the texecom alarm kit
No matter where you live in England, Manchester, or elsewhere in the UK, you must install a security system to protect your property and beloved family.
You may install these alarm systems by yourself, but it is better to ask for help from professionals in this field of activity. You may need some additional cable, so you have to pay some money for them.
Some texecom alarm systems will provide installation services and guarantees to give you peace of mind.
You must know texecom alarm System Company is a very disciplined company that cares about its users, consumers, and buyers.
If your property is not standard or has old-fashioned cable, you need to pay more due to the additional effort of your house.
Texecom alarm system offers site surveys and reduces the risk of intruders or burglars; therefore, don’t hesitate to install one of the texecom alarm panels. This security system connects to the mains through the fuse spur.
Texecom alarm Installation
This part will tell you how to set and use your texecom alarm system. We will notify you how to set the nonstick texecom alarm kit.
To set your alarm on a complete set on your 4-digit code, you will be asked if you want to arm the system. You then press yes.
There is an exit timer too. You need to tie them so you can leave your property. Besides setting your alarm in full version, you can set it on a part set, as most people may call it night set; you enter your 4-digit code.
Then it will ask you if you want to arm your system. Do you then press the part that says do you want even to arm? You then confirm it with the yes button. You can leave the location, and the alarm will then be set.
To unset your alarm and enter your property. Press the entry time, and the time will then start. Therefore you have to enter your 4-digit code. The excellent news is texecom alarm panel is waterproof.

How do I disable my texecom alarm?
If you don’t use your installed burglar texecom system or want to turn off the power to do it completely, then you need to do the following:
- First, locate your texecom alarm panel ( a box attached to the wall)
- Locate the alarm fuse spur ( usually near the alarm panel)
- Remove the fuse from the inside by levering and opening the small section in the front of the box
- Taking the fuse out
By performing all the above processes, your alarm will have no main power. It will run off the battery only after a time. It is time to open the front of the leading alarm panel by unscrewing the screws.
Locate the battery inside the texecom alarm panel and remove the 2 terminal wires, red and black. At this point, the outside bell will start ringing.
You can only do something about this if you get an engineer to do the full decommissioning.
The bell will usually ring for 20 minutes and then stop. At this point, your alarm is decommissioned. Contact some smart security teams if you want a professional engineer to decommission your texecom alarm system.
Texecom alarm system reset
Texecom alarm kit is available in the UK security system market, and it has too many different types with different features and options. Mostly there are 2 kinds of the texecom alarm system, so their resetting progress will be added too.
Some users found the resetting process challenging, while others believe this is simple and easy. Enough practical knowledge is also essential in resetting any type’s texecom alarm system.
You cannot use your texecom system before resetting, programming, or setting it. Resetting is a tangible way to use and activate the texecom alarm panel.
As you know, resetting means changing all the stored and available dates or settings. Resetting any device is the same, and it will change every detail and option of the demanded device, like the security alarm panel.
After resetting the texecom security panel, this alarm kit’s silence mode and default setting will be changed. You can reset your texecom alarm device through the following steps:
- Remove the bottom cover
- Get access to the keypad
- Enter your 4-digit code
- Enter the 4-digit code again
- Press the reset button
- The alarm screen will be normal
- You reset the alarm panel
- Activate it again
We have said before that the other types of texecom alarm kits have different reset processes. Therefore you cannot reset the premier alarm system of texecom same as the veritas alarm system.
You need information about your chosen texecom alarm system and its reset process.
Final thought
texecom alarm is a suitable alarm system for large houses, shops, and offices without WiFi connection. Its new technology will shock you because its sensor will inform the owner about events.
In this article, we have shared information about this alarm system with more sensors, which is an ideal option for any sizeable domestic location. We also show you how to install this texecom alarm step by step. CUCCTV is the authorised partner of texecom alarm systems in the UK.
Finally, don’t waste your time and try one of these alarm systems and install it via the manual instruction or installation guide. It won’t be easy for you, but you can ask for help from a professional engineer.


