
Blog
Wiring security camera guide for the best wired home systems (Manchester)
Learn how to plan, route, power, terminate, and test wiring security camera systems in the UK—then choose a wired setup that stays reliable, scalable, and supported long-term.
- Plan first: map camera positions, coverage needs, and cable routes, minimise joins, and run spare capacity now so expanding later doesn’t mean starting over.
- Use a star (home-run) layout: run each camera back to the NVR/DVR or PoE switch to simplify fault-finding and make upgrades easier than daisy-chaining.
- Match cable to environment and distance: choose outdoor-rated, UV-resistant Ethernet for exposed PoE runs; for analogue HD, pick quality RG59/RG6 (or siamese) you can terminate and weatherproof properly.
- Treat power as part of the design: night-time cutouts are often voltage drop when IR kicks in—use appropriate cable thickness, shorten runs, or move power closer to the camera where needed.
- Install for reliability: drill and seal clean entry points, protect terminations in junction boxes/sheltered areas, leave service loops, label both ends, and test continuity, PoE stability/link speed, and live video before final fixing.
Table of Contents
Quick overview: what matters most
In a hurry? Here’s what matters most when you’re wiring a security camera system that stays reliable through Manchester’s wet, windy weather and winter temperature swings.
- Plan first: map camera positions, recorder location, and cable routes so you pull each cable once and avoid unnecessary joins.
- Use a star layout: run one dedicated cable per camera back to the NVR/DVR (or PoE switch) for easier fault-finding and upgrades.
- Match cable to the job: use outdoor-rated, UV-resistant cable for external runs; choose Cat5e/Cat6 for PoE or quality RG59/RG6 for analogue.
- Protect entries and terminations: drill correctly, seal properly, and keep connectors in sheltered areas or junction boxes to prevent moisture problems.
- Test before fixing: verify power, link stability, and live video before clipping, sealing, and mounting permanently.
These five points work together: good planning reduces joins, good cable resists the weather, and good testing prevents rework after everything is clipped and sealed.
Why wiring makes or breaks a CCTV system
Getting wiring security camera systems right is what separates a dependable CCTV setup from one that drops out on cold, wet nights or becomes a headache to expand later. This guide is written for hands-on Manchester homeowners, landlords, and small business owners who want a clear, practical approach to wiring security camera systems, whether you’re planning a DIY install or preparing to speak confidently with an installer.
We’ll cover how to plan cable routes, choose the right cable types, terminate and test properly, and then select equipment that won’t box you in. At CUCCTV, we support customers daily across Greater Manchester and the North West with genuine, supported CCTV products and straight answers, so you can secure what matters most without guesswork. If you take one principle from this article, make it this: plan first, pull cable once, and test before you fix anything permanently.
Plan your wiring
A good wiring plan starts with a simple map of your property and the result you want: which areas must be covered, what needs facial detail versus general presence, and where night performance matters most. Mark camera positions, likely mounting heights, and the viewing direction, then think about how each cable will physically reach the recorder location without unnecessary joins.
Every extra connector and every avoidable bend is another potential failure point, especially outdoors where moisture and temperature swings take their toll. Decide early whether you’re running cables via loft spaces, along eaves, through trunking, or within wall cavities, because these choices affect cable type and tools. Finally, plan for growth: adding one more camera later is far easier if you leave spare capacity at the recorder and run one or two extra cables while access is easy.
Buying the right items from the start prevents mid-install compromises like mixing cable grades or using unsuitable connectors. Aim to keep cabling, power, and termination consistent, because consistency makes troubleshooting far simpler later. Before you buy, consider the full pathway: entry points through brick or soffits, sealing materials, clips or trunking, and how you’ll protect cables around snag points such as gutters and downpipes.
Topology, routes, and system type (star cabling, Manchester routing, PoE vs analogue)
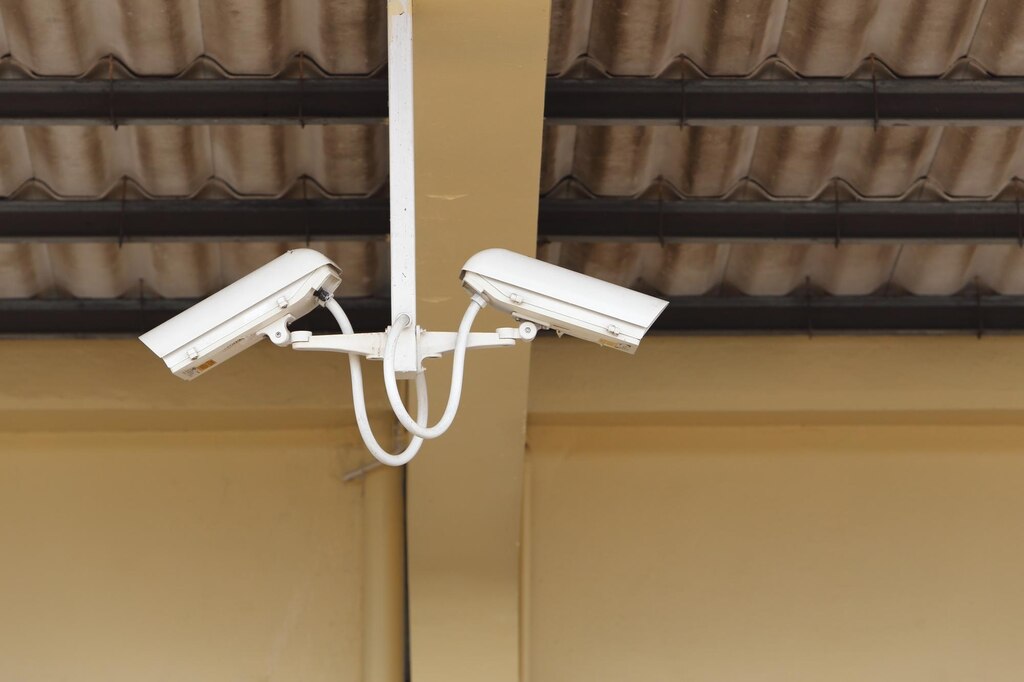
For most home and small-premises CCTV, the most reliable wiring topology is a star layout, also called “home-run” cabling, where every camera gets its own dedicated cable back to the NVR/DVR (or to a PoE switch located near it). Daisy-chaining can look cheaper on paper but often creates cascading problems: one fault can affect multiple cameras, and upgrades become awkward.
Most tidy CCTV cable routes in Manchester and Greater Manchester properties use the loft, eaves and soffits, and vertical drops down internal corners or behind downpipes. Avoid hot zones near boiler flues, high-heat loft areas where cable can sit against insulation and timbers, and places that repeatedly get damp such as unsealed holes under gutters. Wind-driven rain is common here and it finds weaknesses quickly. Try not to run CCTV cables tightly alongside mains power cables for long distances, and cross at angles rather than running parallel where you can. Indoors, trunking can be a clean solution for small businesses or rentals where you want a neat route without chasing walls. Outdoors, favour UV-resistant cable and proper fixing, because sunlight, vibration, and wind movement can degrade and loosen an otherwise working install over time.
Your wiring plan should start by choosing between IP PoE (network cameras powered over Ethernet) and analogue HD (typically using coax with separate power, or “siamese” combined coax plus power). With PoE, a single Ethernet cable can carry both power and data back to the NVR or PoE switch, which simplifies routing and often produces a cleaner install. With analogue, you’ll plan for coax runs plus power distribution, which can be fine for straightforward layouts but requires more attention to voltage drop and power supply placement.
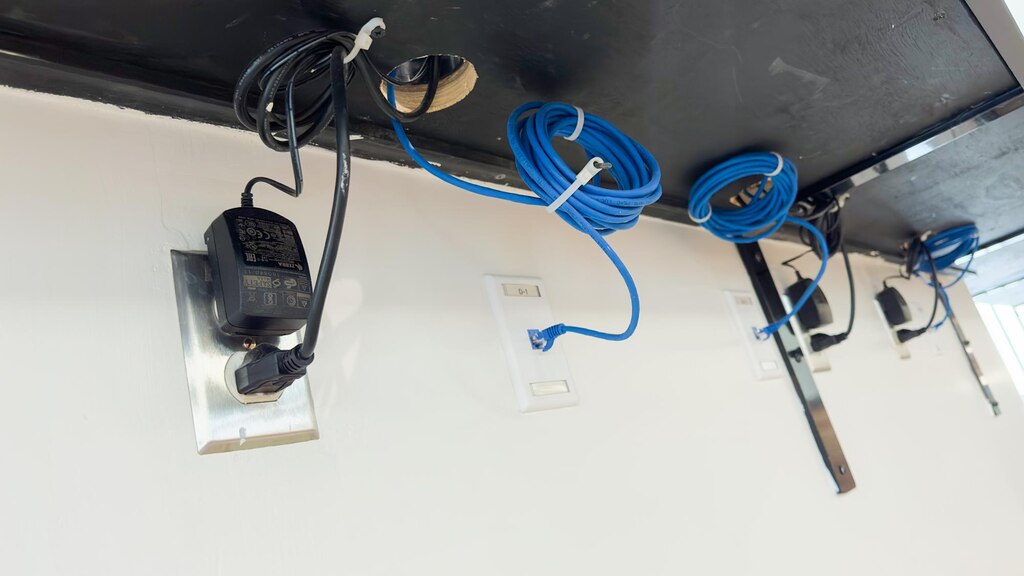
Whichever route you choose, include how cables enter the building, where the recorder and power equipment will live (dry, ventilated, secure), and how you’ll label runs so future maintenance isn’t guesswork.
| Decision | PoE IP (Ethernet) | Analogue HD (coax + power) |
|---|---|---|
| Typical cable plan | Single Cat5e/Cat6 run carries power + data | Coax run plus separate power planning (often “siamese” coax + power) |
| Routing complexity | Usually simpler: fewer separate runs | Can be straightforward, but needs more attention to power placement |
| Common wiring risk | Poor terminations and cable quality affecting link stability | Voltage drop on long 12V power runs (often worse at night) |
| Recorder placement note | Often near the router for easy remote viewing | Can also sit near the router, but may need extra networking steps depending on the DVR |
Cable types and performance
Security camera cabling is one of those areas where “it works today” isn’t the same as “it will keep working through a couple of Manchester winters.” Cable choice affects image stability, resistance to interference, and whether you can upgrade camera resolution later without re-pulling everything.
For IP PoE, quality Ethernet cable and good terminations help maintain stable link speed and reliable power delivery to the camera. For analogue HD, better coax can preserve video quality over longer distances and reduce noise, especially in electrically noisy environments. Choose cable based on distance, exposure (indoor versus outdoor), and how futureproof you want the install to be.
Ethernet and coax options (Cat5e/Cat6, outdoor grade, RG59/RG6, pre-made leads)
For most Manchester homes, Cat5e is often enough for PoE IP CCTV, providing reliable performance for typical camera bitrates and distances when installed correctly. Cat6 can be worthwhile when you want extra headroom, especially if you’re aiming for consistent gigabit links, longer runs closer to the Ethernet limit, or more electrically noisy environments (for example, premises with a lot of equipment, lighting drivers, or workshop tools).
The bigger difference is often not Cat5e versus Cat6, but indoor cable versus external-grade cable. For anything exposed outdoors, along eaves, down walls, or through an external conduit, use UV-resistant, outdoor-rated Ethernet with a robust jacket suited to the route. If you’re going underground to an outbuilding, consider ducting and a cable designed for that environment, because moisture ingress and physical damage are common causes of failures that appear random months after installation.
Analogue HD systems typically use RG59 or RG6 coax. RG59 is common for CCTV and can be a good fit for many typical home distances. RG6 is thicker and can perform better over longer runs with lower signal loss, depending on the system and connectors used.
Pre-made leads can be convenient for quick installs, but they can create awkward slack, force compromises in routing, and sometimes use lower-quality cable or moulded ends that are difficult to weatherproof neatly. For cleaner installs, many installers favour a combined “siamese” coax (coax plus power in one sheath) because it keeps the run tidy and reduces clipping and trunking complexity. If you’re aiming for a professional finish, choose cable you can terminate properly and protect at entry points, rather than forcing a route to suit a fixed-length lead.
Power cabling and voltage drop: why cameras fail at night
Many “mystery” camera issues, especially cameras cutting out at night, come down to power, not video signal. When infrared LEDs switch on after dark, the camera draws more current. If your power cable is too thin or too long, voltage drop can cause the camera to reboot, lose infrared, or produce unstable images.
This is particularly common on 12V systems with long runs, where even a small drop can push the camera outside its operating range. Using a higher-voltage option (where supported), shortening power runs, choosing thicker conductors, or using local power near the camera can solve issues that otherwise look like faulty equipment. The key is to treat power as part of system design, not an afterthought.
How to install security camera wiring
Once you’ve planned properly, the physical install becomes far more straightforward: route cables in a way that protects them, allows access for future maintenance, and avoids sharp bends or strain near terminations. Work from the recorder location outward, because that helps you keep cable lengths sensible and makes labelling easier as each run is completed.
Where possible, keep cables continuous from camera to recorder (or to switch) rather than joining, because joins are common water-ingress points outdoors. Drilling and sealing should be treated as part of weatherproofing, not merely getting the cable inside, especially in Manchester where rain is frequent and often driven into gaps by the wind. Don’t permanently clip, trunk, or close up any route until you’ve tested each run under realistic conditions.
If you’re learning how to install security camera wiring safely and neatly, focus on repeatable habits rather than rushing to mount cameras. Leave a small service loop at each end so you can re-terminate if needed without pulling a new cable. Keep terminations protected, either inside a junction box or within sheltered soffits, rather than exposed on open brickwork. Use the right fixings for the surface and avoid crushing cable with overly tight clips, because damaged cable jackets can lead to corrosion later.
Mark, drill, seal, terminate, and test (entry points, connectors, verification)
Mark your entry point so it lands in a sensible internal location, ideally near the recorder or a cable route such as a loft corner, then drill at a slight downward angle to help prevent water tracking inward. For brick and render, choose a drill bit that matches your grommet or gland and avoid over-sizing the hole, because big gaps are difficult to seal neatly. For soffits, use a small pilot hole before committing to the final size to reduce splintering.
Proper sealing matters: grommets, cable glands, and exterior-grade sealant help stop moisture, cold air, and insects from entering. They also protect the cable jacket from abrasion over time.
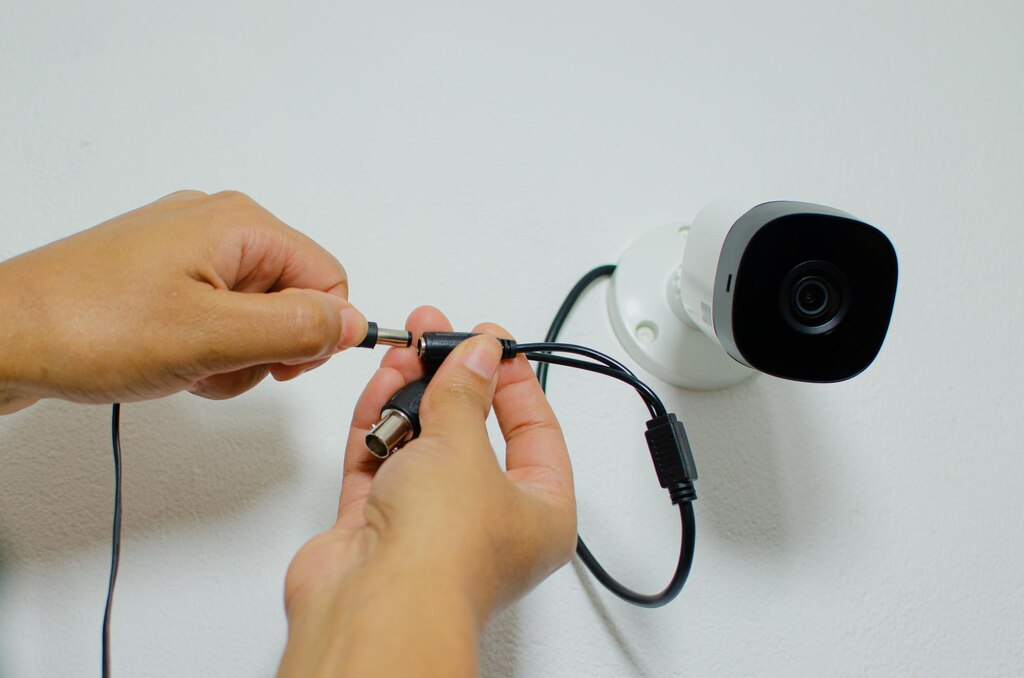
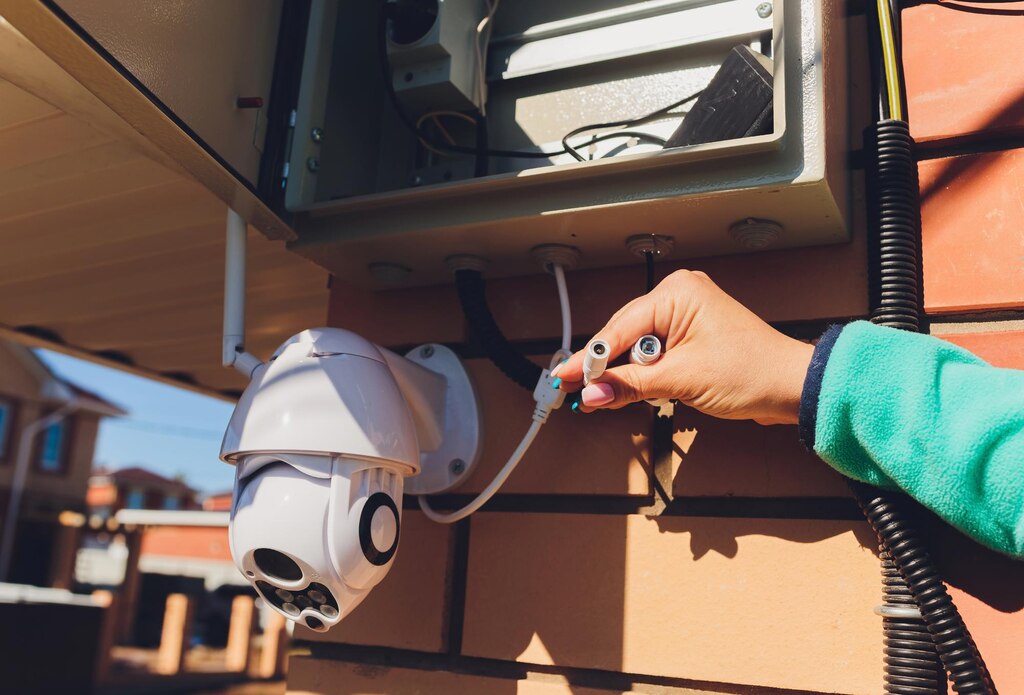
Terminations are where many otherwise good installs fail, because small mistakes create intermittent faults that are hard to trace. For IP PoE, RJ45 connectors must be crimped cleanly with the correct wire order and full insertion; a poor crimp can still link but drop packets or fail under load, which shows up as laggy video or random disconnects. For analogue, BNC connections must be secure and correctly fitted to the coax type, because loose shielding or poor contact can introduce noise and degrade image quality. Patch leads have their place, but they should be used sensibly: short, high-quality patch leads inside by the recorder or switch, not long runs outdoors where they’re exposed and easy to damage.
Testing saves time because troubleshooting is far harder after you’ve mounted cameras, sealed entry points, and clipped everything into place. Label each cable at both ends as you go, using a simple numbering scheme that matches your plan. Then test the run under conditions that resemble real use, because a cable can test “okay” but still fail when PoE draws power or when the link negotiates speed.
| Test | What it confirms | Why it matters |
|---|---|---|
| Continuity and cable test | The run is intact end to end | Prevents chasing “camera faults” caused by breaks or miswires |
| PoE negotiation and stable power | Camera stays powered with no reboots | Catches power issues that appear under load |
| Link speed check (where available) | Stable network connection and speed negotiation | Helps avoid dropouts, lag, and intermittent disconnects |
| Live video verification | Video displays correctly at the recorder and app | Confirms the full chain works before clipping and sealing |
Once a run passes these checks, you can mount the camera with confidence and complete final fixing, trunking, and weatherproofing without worrying you’ll have to undo your work later.
Choose the best wired system
The best wired security camera system is the one that matches your goals today and still fits when your needs change. Start with coverage: you want clear identification at entry points and good overview coverage for driveways, gardens, side returns, or stock areas if you’re a small business.
Night performance is often the deciding factor in Manchester and across the North West, so look for sensible infrared range claims, good low-light sensors, and lenses that fit the scene rather than chasing headline megapixels. Storage matters too, high-resolution cameras generate more data, so your recorder settings and hard drive size should match how long you want to keep footage and how often you need to review it. Remote viewing should feel reliable and secure, with supported apps and firmware updates rather than no-name platforms that may become unsupported.
To avoid the limitations of cheap kits, look beyond camera count and focus on fundamentals. A recorder with limited bandwidth, poor motion detection options, or weak firmware support can bottleneck even good cameras. Cameras with unclear specifications, inconsistent night performance, or limited warranty support can become false economy when you factor in time spent diagnosing problems. At CUCCTV, we supply genuine, supported equipment and help customers choose components that work well together, because compatibility and ongoing support are what keep a wired system dependable for years.
NVR and DVR selection and buying supported kit (channels, storage, authorised supply)
Choosing an NVR or DVR starts with channel count, but plan for headroom. If you think you need four cameras now, an eight-channel recorder often makes sense because the cost difference can be modest compared to the cost of rewiring or replacing a recorder later.
Recording settings matter just as much as channels: continuous recording gives the fullest timeline but uses more storage, while motion-based recording saves space but must be configured carefully to avoid missed events. Storage sizing depends on resolution, frame rate, compression settings, and how many days of retention you want, so treat “one size fits all” hard drive advice with caution. A well-sized recorder with surveillance-rated hard drives and sensible settings helps ensure you have usable footage when something happens.
CCTV is not just hardware; it’s firmware, apps, ongoing updates, and clear specifications that match real-world performance. Buying through an authorised supply chain improves your chances of getting authentic equipment, consistent firmware support, and accurate compatibility guidance, especially important when mixing cameras, recorders, PoE switches, and storage.
It also reduces the risk of grey-market devices that may not update correctly, may behave differently to expected UK specs, or may be difficult to support if something goes wrong. CUCCTV is an official UK partner of Dahua and supplies other leading brands, so customers can build systems with confidence that the products are genuine and supported. For trade customers, having a dedicated account manager adds another layer of practical help, from confirming the right cable type to sense-checking recorder capacity for a specific site.
If you’re ready to plan your install or you want a second opinion before you buy, speak to CUCCTV for straightforward guidance on choosing cable, recorders, and cameras that fit your property and your goals. Whether you’re upgrading an older setup or building the best home security camera system wired for reliable day-and-night coverage, we’ll help you get the design right so the wiring and the equipment work together. Visit our Manchester branch, drop into Huddersfield, or use our online store to get the right kit with the support to match. Tell us how many cameras you’re planning and what areas matter most, and we’ll help you build a system you’ll feel confident relying on.
Frequently Asked Questions about wiring security cameras
What cable should I use when wiring security camera systems outdoors in Manchester?
Use cable that matches both your camera type and the environment. For IP PoE cameras, outdoor-rated, UV-resistant Ethernet is the safer choice for runs along eaves, down walls, or anywhere exposed to sun and weather. For analogue HD systems, choose quality RG59 or RG6 coax (often as “siamese” coax plus power) and protect any external connectors in a junction box or sheltered position. In Manchester’s damp conditions, the biggest reliability gains usually come from weather-rated sheathing, properly sealed entry points, and minimising exposed joins, not simply choosing a higher category of cable.
Is PoE (Power over Ethernet) easier than analogue wiring for home CCTV?
PoE is often easier because one Ethernet cable carries both power and data, which reduces the number of separate runs and simplifies fault-finding. A typical PoE setup is a camera connected by Cat5e or Cat6 back to an NVR with PoE ports or to a PoE switch near the recorder. Analogue systems can still be straightforward, but they usually involve coax plus separate power planning, and longer 12V power runs can introduce voltage drop issues. If you want a clean install with fewer variables, PoE is usually the simplest route for most homes and small businesses.
Why do wired CCTV cameras sometimes cut out at night?
Night cut-outs are often power-related. When infrared LEDs switch on, the camera draws more current. If a 12V power run is long or the cable conductors are too thin, voltage drop can cause the camera to reboot, lose infrared, or behave unpredictably. This can look like a camera fault even though the camera is fine. Practical fixes include shortening the power run, using thicker power cable, moving the power supply closer to the camera, or using a higher-voltage option if the camera supports it. With PoE, the focus is usually on cable quality, termination quality, and ensuring the PoE source can supply the required power budget.
Should I join CCTV cables if I’m short, or is it better to re-run the cable?
It’s usually better to re-run a continuous cable from end to end. Joins add failure points and, outdoors, they are common places for moisture ingress. If you must join a cable (for example, a difficult route where a re-run is genuinely impractical), use proper connectors and a weatherproof junction box, and make sure the join is accessible for future maintenance. The goal is to avoid hidden joins behind soffits or inside damp voids where a small water leak can create intermittent problems months later.
How can I test my wiring security camera runs before I mount everything permanently?
Test each run in a way that reflects real use, not just “does it light up.” Label the cable at both ends, then confirm the cable is intact, the camera powers reliably, and the video is stable at the recorder and app. On PoE systems, check that the camera doesn’t reboot under load and, if you have the option, confirm link speed negotiation is stable. On analogue systems, verify the image is clean and stable without noise or rolling interference. Doing this before clipping, sealing, and final mounting is what prevents a small termination issue from turning into a full afternoon of undoing finished work.